Monthly Archives: July 2012

Camden Climbing Trip

View from Barrett’s Cove cliff

Let me begin by explaining the overall plan for the weekend. Friday night we were to head down to Camden and camp at the State Park campground, costing about $10. Saturday was climbing in Camden (with beautiful weather of course), while spending the night in Acadia after a beautiful rain free drive up to Mount Desert Island. Sunday would be the grand finale, three climbers climbing for their first time in Picturesque Acadia National Park, with the waves crashing just below us on a beautiful sunny day.

This did not progress as planned in full, but it was still a great weekend with some good laughs and some great climbing.

Lauren and I brought our friend Tracy along on this trip, whose attainable dream was to climb the beautiful sea cliffs of Acadia. Neither Tracy nor Lauren had climbed in Camden before so I was looking forward to playing tour guide at our first stop. As planned we cruised down to Camden on Friday night to carve out our little piece of home for the night and set up camp. We were quick to meet the stern face of the park ranger who only said “you don’t have a RESERVATION!?” when inquiring about accommodations for the night.  Needless to say this led to our rejection from this location. We then drove 10 miles or so north to another campsite, where we were offered a tentsite at a reasonable price. Although this was not the camping the three of us were used to (everyone was camped in a circle around a pond), but we got a good nights sleep all the same (with working bathrooms and all)!

With a fairly early wake-up (for the weekend) we were ready to hit the cliffs! Naturally I guided our team to one of two places that I had been to previously to get a good warm up before exploring some new territory. The first place we decided to go was Barrett’s Cove cliff which is an impressive wall that can be seen approaching on Route 52. Not only does this cliff have some great multi-pitches right in the center (which I can’t wait to get to some day), but there are some shorter moderate routes off to the left side as well and this is where we headed. I took the girls to a nice slab that offers a few 5.6-7 climbs with accessible anchors so I could go set up top rope. The route of choice here was a slight combination of Young Stud (5.6), and Old Spice (5.6). These routes both offer some superb slab climbing with some very thoughtful footwork, pinchy holds, and an old rusty piton towards the top of the route! Everyone loves a nice slab climb to wake up the legs and the brain meats.

Lauren gets ready to work her magic on the Old Spice slab

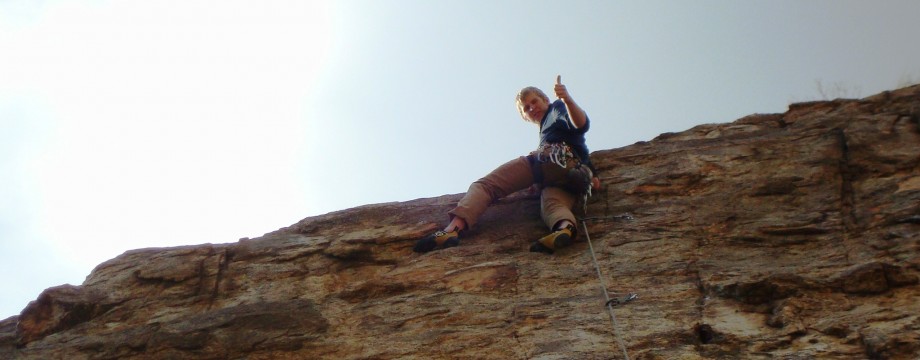
After we got warmed up it was time to explore! The last time I had gone there my friend Brad Staier (who I do a lot of my climbing with) and I wanted to check out “The Verticals,” but we got distracted and climbed some other cool mixed routes we found instead. So with two more focused individuals than Brad and I on the trip we made it to the Verticals! Right away we picked out a line that we thought would suit us, mostly because it was the shortest route and we knew my 60m rope would suffice, but it also looked super fun! This route was called Deception (5.10b) and it was the rightmost route on this wall. Deception starts out with some fairly pumpy moves working right on a flake, with a nice cross to reach a good finger pocket. After gaining good feet to get onto the face, there are some very nice crimpy/balancy moves trending left along a blunt right facing bulge that runs from about halfway up the route to the top. It was an instant classic and Tracy considers it the best route that she has ever done. 

Tracy on Deception (5.10b)

Lauren finding good face features on Deception (5.10b)

The author on the pumpy starting flake

There were more routes to explore on the Verticals but alas, it was time for lunch! After a nice descent back down the stream bed that we took up for a trail, we were back at the car and scarfing down sandwiches with too much cheese and questionable meat (or…I guess that was just me). After lunch we went to the only OTHER place that I had been in Camden which was just down the road and I knew this spot a little better. The place we were headed is called the “Rampart,” and it has some of the best development in the area done almost single-handedly by a man named John Weaver. On my last trip to Camden with Brad we had the pleasure of meeting John Weaver and got to hear about the amount of development that he has put up over the last 20 years.

On the approach to the Rampart walking down the carriage road that splits from Route 52, we stopped at a spot that Brad and I had found last time we were up there. There are three very short routes with bolted anchors that have some awesome and easy trad potential. Being very new to trad climbing I love stumbling upon little gems like this. After leading the longer of the short pitches I set a top rope for the girls to hop on and enjoy the nice moderate goodness as well. This was a big moment too, because when Tracy climbed it at the end, she decided to clean the anchor and rappel for the first time, and everything went smoothly.

The awesome trad pitch (anchor above and right of last ledge)

After getting this fix, we headed up right to work our way over to the Rampart. After a bit of scrambling to get over to the cliff, I had to do a little more to get up to the anchors of a nice 5.10d that we spotted coming in called Prospero, far left of the Dream Weaver prow. We chose this route because it was getting late and it looked to be the most accessible to quickly set a top rope. I was the only one who made it up the 5.10b (with pretty much all power moves), but everyone agreed that the route had some great features and a good location. At the end of the day, Lauren’s finesse always trumps my power moves anyways! 🙂

“Dream Weaver” prow

The day was getting late so we decided to pack it up and head to Acadia to settle into our KOA campsite (again, Blackwoods and all others were booked). The drive to Acadia was lovely, and rain free most of the way! After we settled into our campsite and ate our dinner (some nice tortellini is good after a day of climbing), we all decided some good ol’ Bar Harbor ice cream was in order. So we jumped back into the car, got our ice cream in town, and walked around Bar Harbor for a bit on a cool Saturday night. My stomach felt like a ripe Watermelon all the way back to the campground, but after an hour or so I was ready for sleep and we all got ready for bed.

The last thing we wanted to hear the next morning was bound to occur in the form of little flicking sounds on the fly of our tent. It was very light at first so we thought, “Hey, why not just go set some top rope on Otter Cliffs, climb one or two routes and call it good.” But as the morning progressed the weather said, “I mean, you guys COULD do that, but I tend to shatter dreams in the form of downpour, so you should probably sit this one out.” The weather was spot on, as the rain poured harder and harder our motivation degraded exponentially. As a compromise we took one last stroll through Bar Harbor and got some coffee at a nice little bakery (Lauren would know the name). After the wet stroll (complete with an  awe-worthy parallel parking job) we decided to at least drive over and check out Otter Cliffs anyways, especially since I have a pass so we could get on to the Loop Road. When we arrived at the cliffs we were astonished to see that in this monster of a downpour there were still guiding services out with their clients! Nobody really seemed to be bothered by the rain which we thought was pretty BA, and after watching for a few minutes and gawking as the guides set their trad top rope anchors, we decided to head home after an awesome trip on the whole.

So the weekend was a success! The camping arrangements didn’t work out the way that we had planned but we were able to arrange some cheap camping after all. We still got Camden, which neither of the girls had been to and there were plenty of positives to be taken from our journey to Acadia:

  • We got to see what a KOA site was like (not half bad)
  • Got to eat some quality ice cream in town
  • Got to at least SEE Otter Cliffs and people climbing on them
  • Got to eat Epi’s pizza (which is always a treat)

So who can call any of that a loss? Acadia will always be there and we are planning on heading down some time during the week soon. The trip was an overall success and everybody was satisfied at the end of the day!

For guidebooks I used Rock and Ice Climbs in the Camden Hills by Ben Townsend. This is a decent guidebook from someone who seems to know the area pretty well. The only real downside is that there are no topos and only a few photos throughout the whole guidebook. This guidebook is certainly enough to get you around though, and if you get as lucky as Brad and me you could end up meeting John Weaver! I also used Rock Climbing New England by Stewart Green, a more general guidebook for everywhere from Connecticut to Maine which has more pictures of certain climbing spots and some simpler descriptions of approaches.

Even though it has been hot and muggy recently, there is always some good rock climbing to be had, especially when you have some rain or a nice ocean nearby to cool you off afterward. 🙂

Even pouring rain can’t keep us from our coffee!

Keep on the sunny side!

Categories: Climbing | Tags: , , | 1 Comment

Backpacking Gear List

Near Pima Canyon, Tuscon, AZ

I have been backpacking since I was 16, when I  first started going into the Bigelow range with my father, and then alone, with the good old “mom, can you drive me to go walk into the woods and camp out by myself?” In the early days my father and I relied on a plethora of gear to get us through a weekend trip, sparing no luxuries along the way…….including fly fishing gear.

Up on Horns Pond, in the Bigelow range, a place worth hauling fly fishing gear to

Since the early Bigelow days, I have branched out a bit, and in my travels I have come up with a recipe for a long backpacking trip. Following is a list of the essentials that I bring on every backpacking trip, with some luxuries that vary according to the trip. I have divided the main sections into three parts: there is the first dry bag (bottom of the pack), the second dry bag (top of the pack), and the things I carry on the outside of the pack.

To start, the “dry bags” I refer to are the contractor bags that I line my pack with, to waterproof the pack on the inside. I also carry a pack cover, for the downpours that will naturally occur at some point, but the contractor bags will keep everything on the inside dry regardless of outside covering.

Items in the first dry bag, the bottom of my bag:

  • Tent – I carry a Big Agnes Seedhouse 1, a quality one person tent that I have had for a few years now, light for a backpacking tent, and I have never had any real issues with condensation. (This is also a luxury considering I used to only carry a bivy sack).
  • Clothes bag – This is the piece of gear with the biggest variation overall. In the summer (and early fall) this is what I carry: 1 long underwear bottoms, 1 long underwear top (I use a Wild Things soft shell), 1 pair heavy synthetic socks (smart wool is good), 2 pair light hiking socks (I use Bridgedale synthetic), 1 pair Underarmour spandex bottoms, 1 pair synthetic hiking shorts, 1 synthetic shirt (poly blend, capilene is good too), 1 pair cotton boxers for sleeping, and 1 cotton shirt for sleeping. This is the basic list; I also carry a Buff that I wear around my neck for sunburn and mosquitoes, and a pair of gaiters.
  • Sleeping bag – I carry a Marmot Atom 40 degree bag for summers and early fall, but outside of this warm realm, I carry a 15 degree Kelty bag. The bag I carry is down fill; I could write a whole other post about sleeping bag fill, but bottom line is I prefer down to synthetic because it tends to be lighter, and who doesn’t like waking up to feathers all over their tent!

Items in the second dry bag, the top of my bag:

  • Cooking pot – For a pot, I carry a titanium REI cooking pot; it is the smaller of a set (probably about 3 liters), and my dad has the larger one. titanium pots are great, because they are lighter and they do not build residue as quickly as anodized aluminum, but they are more expensive. Inside of the pot I carry a Light My Fire spork, a small microfiber cloth, and some good ol’ Dr. Bronner’s of course.
  • Camping stove – for a stove, I carry an MSR Simmerlite stove (although now I believe it is called the windpro). It is a great stove, fairly quiet and very fuel efficient when properly cleaned. I carry either an 11 or 20 ounce fuel bottle with the Simmerlite attachment depending on the trip.
  • Toiletries kit – this is where I keep all of my things that I do not want to get covered in Gold Bond! (Which is in my first aid kit). In here, at any given time I have my toothbrush, small tube of toothpaste, bottle of ibuprofen (vitamin I), bottle of Immodium, bottle of Tylenol extra strength (for fever, I have gotten the flu while out backpacking), tube for ear plugs, tabs of Sudafed, backup water purifying tablets, and some other things that may vary by trip (or that have been in there forever).
  • First Aid kit – Now this is something that will certainly vary by the level of experience of the hiker with this sort of thing, and what you are willing to carry. I have no formal training in first aid, so everything I have is extremely basic. In my first aid bag I have some mole skin for blisters, waterproof bandaids, some larger bandaids, a wrap with closures, bottle of Neosporin, small bottle of Gold Bond (I get sweat rashes on my shoulders from my pack), a spare shoelace, a latex glove, and a clothesline.
  • In this top bag I have few other assorted things that do not necessarily fit into specific categories, but are still essential. I carry a pack cover, as I mentioned before, and it is one of the nice large sea to summit ones. I carry a small titanium cup with a 1 cup mark etched into the side, and I use this for measuring water to boil and for hot chocolate (mint, mmmmm). I use an inflatable pillow now (I know, I’m spoiled), but I used to just use my clothes bag. An alternative to the inflatable pillow is to use an old blow up wine bag, from a box of wine. I have a rope that I use to hang up my food in a tree when I am not in a shelter, and slid down almost to the end of the rope that I would hang my food from I have the end of a soda bottle cut off. This is a “mouse baffle”, because the mice cannot get around this handy little device. For a headlamp I carry an old Petzl model, it has lasted me this long and you really can’t go wrong with this brand. Besides these essentials I have a roll of toilet paper in a plastic bag, and whatever book I might be carrying (ripped down to save weight of course) 🙂
  • I keep my rain shell on top of everything in the top of my pack, for quick access and a first barrier for rain coming in from the top.

My cooking kit

First aid kit on the left, toiletries on the right

Next up are the things that I carry on the outside of my pack, most importantly for easy access:

  • 2 water bottles – I carry a clear Nalgene bottle (so I can see the quality of the water), and another clear 1 liter bottle (either a Polar seltzer bottle, or a Gatorade bottle).
  • 1 platypus pack – This is another water reservoir I carry, it’s about 3.5 liters and I will fill it  if I need cooking and dishwashing water.
  • Steripen – This is what I now carry for water purification. There are pros and cons compared to the pump style water filter, but for weight and length of time it takes to purify, you can’t beat this form of purification.
  • Plastic bags – I carry a variety of plastic bags rolled up in the side pocket of my pack. These are good for anything from trash to some food that you might pick up in town that you want to carry out. I usually carry a few gallon bags and some of the smaller sandwich bags.
  • Small bottle of hand sanitizer – For the bathroom trips you will inevitably have just when you’re getting your stride.
  • Tent poles and stakes – I like to carry these on the outside of my pack, as they are kind of awkward to fit inside of the pack and mine rest very nicely right next to my Nalgene.
  • Compass – Most of the trips that I take are on the A.T., where almost no navigation skills are necessary, but I do have some map and compass proficiency, so it is nice to have along anyways.
  • Gaiters – I add these because I usually keep them on a caribiner on the outside of my pack, until the trail gets nice and thick.
  • Cotton bandana – Good to have for anything really, drying off after a river fording, pre-filter for water treatment, or just for sweat.
  • Z-lite sleeping pad – I used to use an open cell sleeping mat, but I really love this pad, because after a 20 mile day, it really doesn’t matter what I fall asleep on. These things will last forever too!
  • Crocs – I use a pair of Crocs as my “camp shoe”, to give my piggies a nice rest when I get into camp for the night.
  • Tyvec footprint – This is the footprint I use for my tent. It is a piece of Tyvec that I cut to fit the dimensions of my tent. I keep it folded up right on top of my pack so that if I am sitting down to rest somewhere wet, I can just throw this down and avoid the wet butt!

My pack all packed up, and of course my calling card, the Ben and Jerry’s hat

As far as other gear that I didn’t mention in packing the pack there are two pieces that should be noted and chosen carefully. The first being the actual pack itself! I carry a Granite Gear Vapor Trail, which I don’t think is even in production anymore, although you can probably get some that are going on clearance now (that’s how Lauren got her women’s version!) This is my third pack that I have used and again, this is something that you should select carefully, and try a variety of packs bearing weight to see what style you truly prefer. I prefer this particular pack because of the sheer simplicity. There are two strips of what is essentially memory foam on the back and no fancy support system, this is good for me because I have misaligned shoulders and it is very malleable. The other essential is shoes, and this is another piece of gear that should be carefully selected and researched before purchasing. This is also another area where preference weighs heavily on selection, but I prefer lower cut hiking shoes, and without a gore-tex lining for more breathability.

Hopefully through this post I have given the aspiring backpacker some tips to get started, and the weathered backpacker some tips for modification. These are all things that I have narrowed down out of necessity over the years, and bring on every long backpacking trip. Stay tuned in the future for a post about what I bring for food and some cooking ideas 🙂

Keep on the sunny side!

Categories: Backpacking | Tags: , , | 1 Comment

100 Mile Wilderness

Upon entering…..the 100 mile wilderness!

The 100 mile wilderness, which actually falls just shy of 100 miles, is a section of the Appalachian Trail in Maine that starts in Monson, and ends on Abol Bridge, which is just outside of Baxter State ParkSigns, like the one pictured about, are posted on either end of the 100 mile wilderness, warning the inexperienced to stay away. The Appalachian Trail Thru-Hikers Guide warns  that this can be an exaggeration of the true difficulty of the 100 mile wilderness, and that there are in fact resupply points within the wilderness that are relatively easy to access.

After doing this trip I can say a few things about the difficulty and access within the 100 mile wilderness. On the difficulty, this section can really be broken up into two sections, the moderate ups and downs of the first 45 miles (approximate distance from Monson to Whitecap Mountain), and the easier, flatter 50 miles that remain to reach Abol Bridge. While the first 45 miles holds great views from peaks such as the Barren Ledges, Fourth Mountain, and Whitecap Mountain (the highest peak in the 100 mile wilderness), the flatter, easier latter half of the wilderness still holds many beautiful sights, walking through pine beds and along beautiful streams flowing pleasantly through the Maine woods (not to mention the call of the Wood Thrush).

Beautiful view on a gorgeous day from Whitecap Mtn.

Now for the duration of this trip… When I decided to hike this section, I was on a time crunch from the get go. My father invited Lauren and me to join he and some friends to climb Katahdin on Saturday July 14. I thought “great, I’ve got some time off work, why not start the 100 mile wilderness now and meet them there to hike it!” This time off of work began the weekend before, so my genius plan for this dramatic approach would require me to start on Sunday July 8, and be out on Abol Bridge by Friday July 13. I started the hike at 12pm that Sunday, putting in a quick 15 miles by 7:30 that night. The next day, still feeling relatively fresh, I pushed through some of the larger vertical gains that would arise consecutively on the trip, going over Barren Ledges, Barren Mtn,, Fourth Mtn., Third Mt., Columbus Mtn., and Chairback Mtn. By the end of this 16 mile day I was pretty shot, so I camped next to a beautiful river that I would ford the next morning. My third day out was the largest test of my hiking stamina, with an approach to Gulf Hagas Mtn. on a hungry, aching belly (there is no amount of food I can carry backpacking to satisfy my hunger)! I had hit Whitecap Mtn. by mid-afternoon, which gave me a good descent to take my time and put in some easier miles to round off with a 14 mile day. The next morning my legs seemed to wake up and say “hey Sean, lets put in some REAL miles today”. unfortunately my feet did not agree with this, but they managed to make it through the easy going 20 mile day. Being subject to a serious time crunch, the next day was no better for mileage, in fact, it was more! With a cruise of a morning, and some throbbing feet by night, I was able to put in a 22 mile day, eating my dinner at a shelter, and continuing to a campsite which I reached later that night. The 22 mile day set me up very nicely for a casual exit of the 100 mile wilderness the next day, only having to put in 11 miles to reach Abol Bridge (with plenty of time to inhale a sandwich and some ice cream at the Abol Bridge store before my parents and Lauren showed up).

As far as the access that I mention in reference to the Appalachian Trail Thru Hikers Guide is concerned, the bottom line is that no hike should be underestimated, even a day hike. You should always be prepared and know what you are setting out for, and be comfortable with your experience level before taking on any challenge. The 100 mile wilderness does have some points of access (various logging roads that cross the trail, and The White House Landing), but you should not plan on relying on these unless you have made plans before hand. Know how much you will eat in those days, and bring the gear necessary for any long backpacking trip.

Sign at Abol Bridge, same as the one in Monson!

While I still enjoyed myself (even though I was too beat up to hike Katahdin the next day), this trip is worth taking two or so more days to do, it is a strikingly beautiful section of the trail, even by Maine standards, and hiking at your own pace is ALWAYS the best way to hike. As I mentioned, I didn’t get to hike Katahdin the next day but I was able to hike up a nice blue blazed trail with my parents and Lauren to a spot called “Blueberry Ledges”, it was a nice relaxing afternoon and a gorgeous hike with some wonderful people.

Stay tuned for my next post describing some of the gear I used on this trip, and the gear I generally take on long distance backpacking trips. I may even throw in some good backpacking recipes 🙂

Lauren and me

Keep on the sunny side!

Categories: Backpacking | Tags: , , , | 1 Comment

Blog at WordPress.com.